

A healthy home is one that is clean. Dust, dust, shape, and creature dander are only a couple of the allergens that can set off asthma and other respiratory issues. Furthermore, a grimy home is the ideal favorable place for microbes and infections. A cluttered kitchen is more likely to have dangerous illnesses that can be passed on through food, and a damp bathroom is an ideal environment for mold to grow. You can significantly lower your family\’s risk of developing asthma, allergies, and other respiratory conditions by keeping your home clean. By regularly cleaning and disinfecting your home, you can also help to stop the spread of bacteria and viruses.
Cleaning is also necessary when it is time to move. In addition to the fact that you clean the spot you\’re leaving, however, you ought to likewise clean your new home. Moving into a new and clean home is an incredible inclination. When it comes to cleaning your new place and the one you\’re leaving behind, here are some things to keep in mind.
What to Clean Before Moving Out
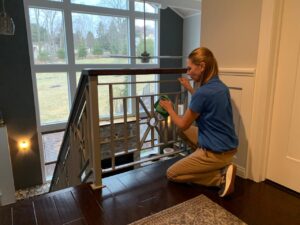
- Remove nails from the walls and patch the holes
One way to personalize a space is to decorate the walls, and you\’ll be bringing all of those wall decorations with you to your new home, right? So what does that abandon? Harm to the walls. The equivalent goes for any additional apparatuses you used to jazz the spot up — think towel snares, cap racks, timekeepers, furniture secures, shower caddies, and so on. Do you remember how using the drill took a few tries to get those holes right for the TV mount? When you take it down, they\’ll be pretty obvious, yes. Just one example: All of those gaps need to be filled in, sheetrock and other wall surfaces need to be repaired, and the paint needs to be touched up.
- Add a fresh color of paint
The majority of rentals use standard, neutral paint colors, so it\’s understandable if you\’ve changed the colors to better suit your color preferences. Notwithstanding, this present time is the opportunity to take those walls back to their previous brilliance for the following inhabitants. In most leases, you must do this to get your deposit back because paint colors that aren\’t neutral can make the house look bad (read: rentability) of the home. Now, if your landlord says it\’s okay to keep the custom colors, keep them! Just make sure you get that approval in writing to make sure nothing gets misunderstood.
- Wipe the windows and doors
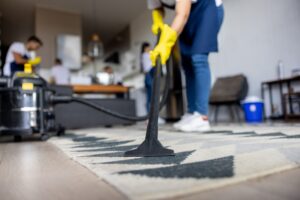
Doors are a part of the house that is frequently overlooked during routine cleanings. In any case, just cleaning down the entryways and their edges hugely affects the radiance factor for your stroll through. Furthermore, we\’re not simply discussing ways to rooms. This also applies to cabinet doors in the kitchen, bathroom, and other permanent fixtures. When you see how clean they get, you might not even notice how dirty they are.
What to clean before moving in
Another house or loft presents countless conceivable outcomes. A space with no walls, no clutter, and a blank canvas on which to build your home. However, you need to take care of the fundamentals before you can begin the enjoyable aspects of moving to a new location. Specifically, the thorough cleaning of the new house.
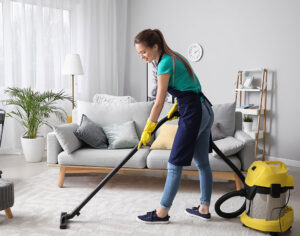
Whether you\’re leasing or purchasing, move-in cleaning is a major need. No matter how well-intentioned the previous owners were, they unavoidably left behind some dust, dirt, and grime that you will want to clean up before you can really settle in. That blank slate is not quite as blank as it appears unless you have just moved into brand-new construction.
Cleaning a house before you move in is the best approach since you will not have the additional trouble of expecting to work around a lot of furniture and boxes. But it\’s fine if you have to wait until after you move; just don\’t skip the clean. The same holds true if a cleaning crew showed up before you got the keys. This is one corner you simply don\’t have any desire to cut. Although there are a lot of steps involved in cleaning, you should be able to make your home look brand-new in as little as a day or two with some hard work and maybe another pair of hands to help. To get you started, here are some suggestions.
- Clean the High Places Before reaching the Low
Dust is not restricted to countertops and floors. Ceiling fans, overhead lighting, shelving, and other close-to-the-ceiling features are also susceptible to grime, but they are less frequently cleaned and, when they are cleaned, tend to scatter dirt and dust onto the space below them. Start at the top of each room and work your way down because cleaning these high-up features will inevitably make the area below them dirty as well. Dust often falls from the ceiling fan blades. To limit the inadvertent blow-back, slip an old pad case over every cutting edge and wipe away from the focal point of the apparatus utilizing within the cushion case\’s top layer. The majority of the getting away from residue will get gathered for the situation, which you can simply spotless or throw whenever you\’re finished.
- If you are cleaning after moving, clean the fridge first
There are a few things you can put off while you get everything cleaned, except putting away your short-lived food isn\’t one of them. Sanitize your new fridge first before doing anything else. It shouldn\’t take more than 20 minutes because there is no food in there. If you can, take the shelves and drawers out and clean each one separately with soap and warm water. Make a solution of equal parts water and white vinegar for the interior of the fridge, then scrub all surfaces with a clean rag. Allow the water and vinegar solution to soak in for a while if there is any stuck-on gunk to be removed. Ensure racks are totally dry, and afterward return them to the ice chest. With the freezer, repeat these steps. Put some boiling water on the sticky fridge grime that just won\’t go away if you boil some water. Give the water a thorough scrub with your muscles once it is cool enough to touch. It ought to come off.
- Clean the Kitchen
You can begin working on the rest of the kitchen after cleaning the fridge. Follow the first step by starting with the lighting fixtures, ceiling corners, and cabinet tops. Next, work on the appliances: dishwasher, microwave, sink, stovetop, and oven are followed by the countertops. Do the cupboards next, trying to clean them on both within and the outside and really focusing on their handles. For the time being, put off doing the floor. Baking pop and hydrogen peroxide make a stalwart answer for disposing of difficult burner stains. Make a paste by combining just enough hydrogen peroxide and baking soda in a small bowl. Scrub it after spreading it over the stove and letting it sit for 15 minutes.
If you want to make your home easier to manage, check out our guides for professional cleaning. Additionally, give us a call if you need assistance cleaning your bathroom or the entire house. You can count on The Maids to assist you in creating a healthier and cleaner home.
Choosing the right cleaning company is very crucial and it draws a bridge between the family members and the pathogens. When looking for a certified company to create a safer environment for your family the name AmeriStar Maids always comes to mind.
AmeriStar Maids provides a very good range of hygiene services for residential homeowners. Every employee in AmeriStar Maids is trained and very experienced in any kind of cleaning required depending on your home. AmeriStar Maids also comes with the right equipment needed to provide maximum satisfaction and even reach higher points and every nook and cranny. It has teams working on flexible hours to be at your service wherever you schedule them. Another profitable quality is that AmeriStar Maids always double-checks to ensure every demand has been met and surveys the place post-cleaning to ensure they have not missed any spots.
Contact AmeriStar Maids today!
Visit our website: https://ameristarmaids.com
Give us a call: (570) 310-1057
Email us: info@ameristarmaids.com